The default session duration for SAML authentication is four hours. You can modify the
SessionNotOnOrAfter attribute to lower the session duration. See Session duration for more information.Create and configure SAML application in Entra ID
To set up SAML, your organization’s Entra ID administrator must create an application for Endor Labs and generate the SSO URL and certificate. To configure your Endor Labs application in Entra ID:- Sign in to Entra ID. Select Enterprise Applications and click Create your own application.
-
Enter
Endor Labsas the name of your application and select Integrate any other application you didn’t find in the gallery (Non-gallery). - Click Create to initiate creating your enterprise application.
- Under Overview, click Single sign-on and select SAML. This redirects you to the SAML-based Sign-on page.
-
Edit the following details in Basic SAML Configuration and click Save.
- Identifier (Entra ID):
https://api.endorlabs.com/v1/auth/sso - Reply URL (Assertion Consumer Service URL):
https://api.endorlabs.com/v1/auth/saml-callback?tenant=yourtenant
Replaceyourtenantwith your tenant name.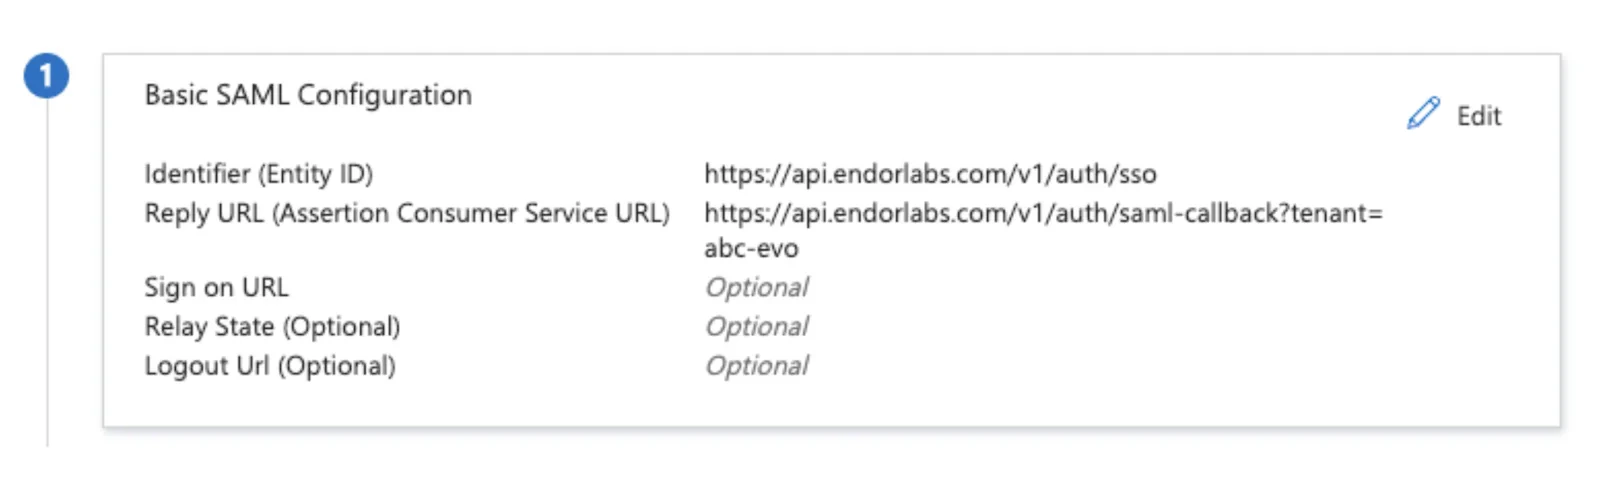
- Identifier (Entra ID):
-
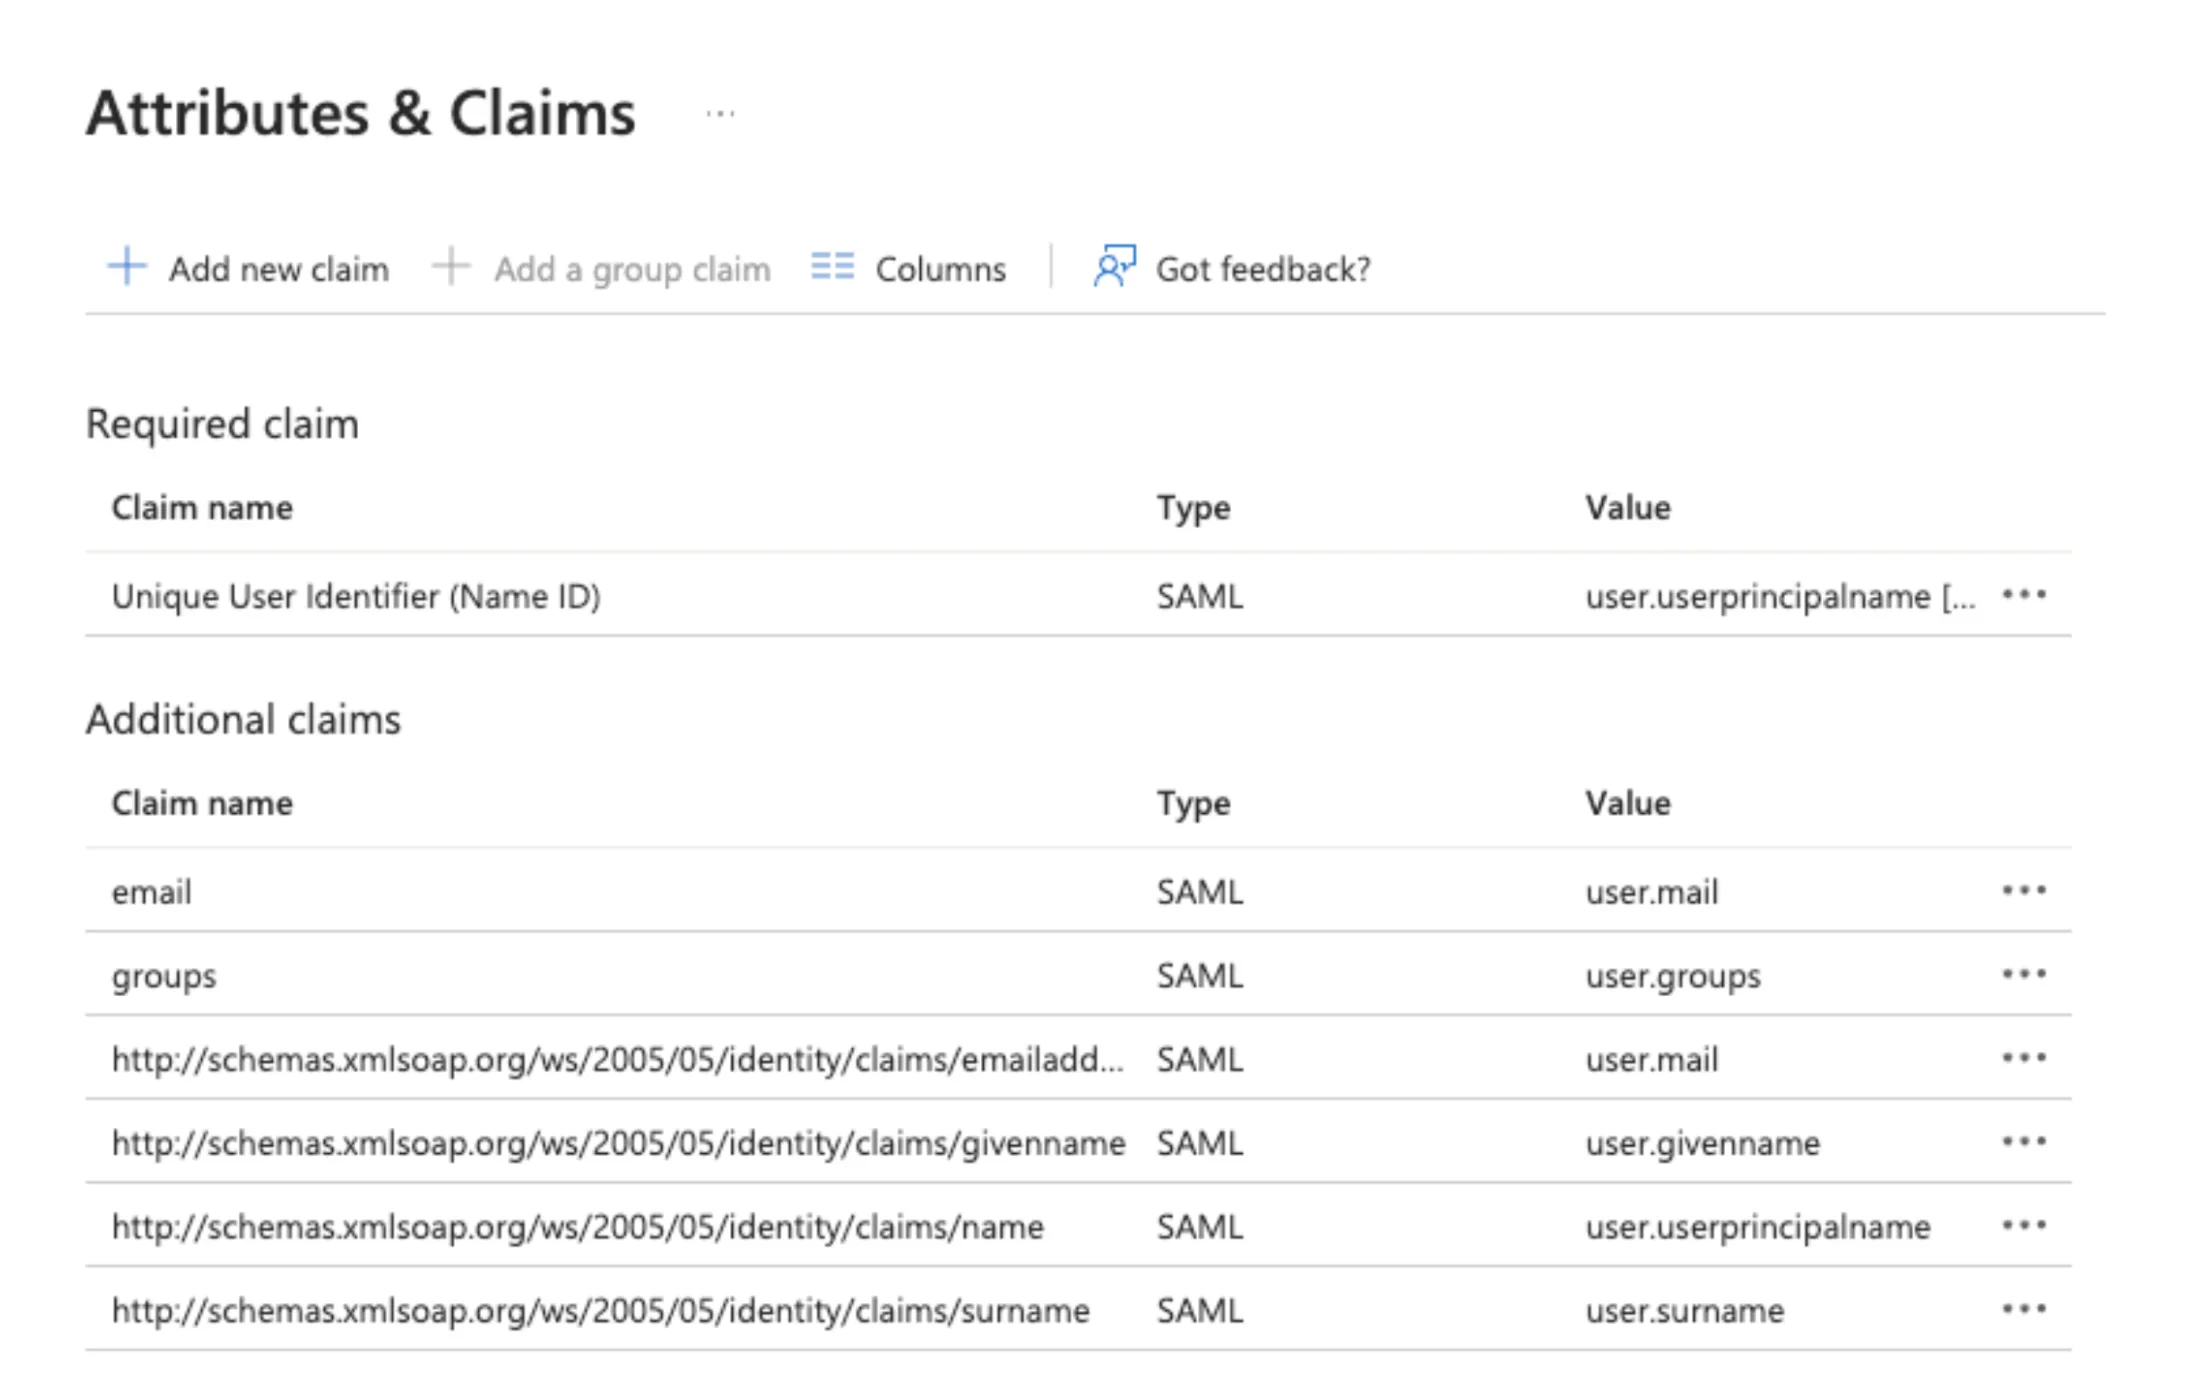
In Attributes & Claims, select Edit to add required claims, additional claims and group claims.
a. Select Add new claim and fill the following details:
- Name: Enter
email. - Source: Select Attribute.
- Source Attribute: Select
user.emailfrom the list.
- Which groups associated with the user should be returned in the claim?: Select Security groups.
- Source attribute: Select Group ID from the list.
- Advance options: Select Customize the name of the group claim, and enter
groupsin Name (required).
- Name: Enter
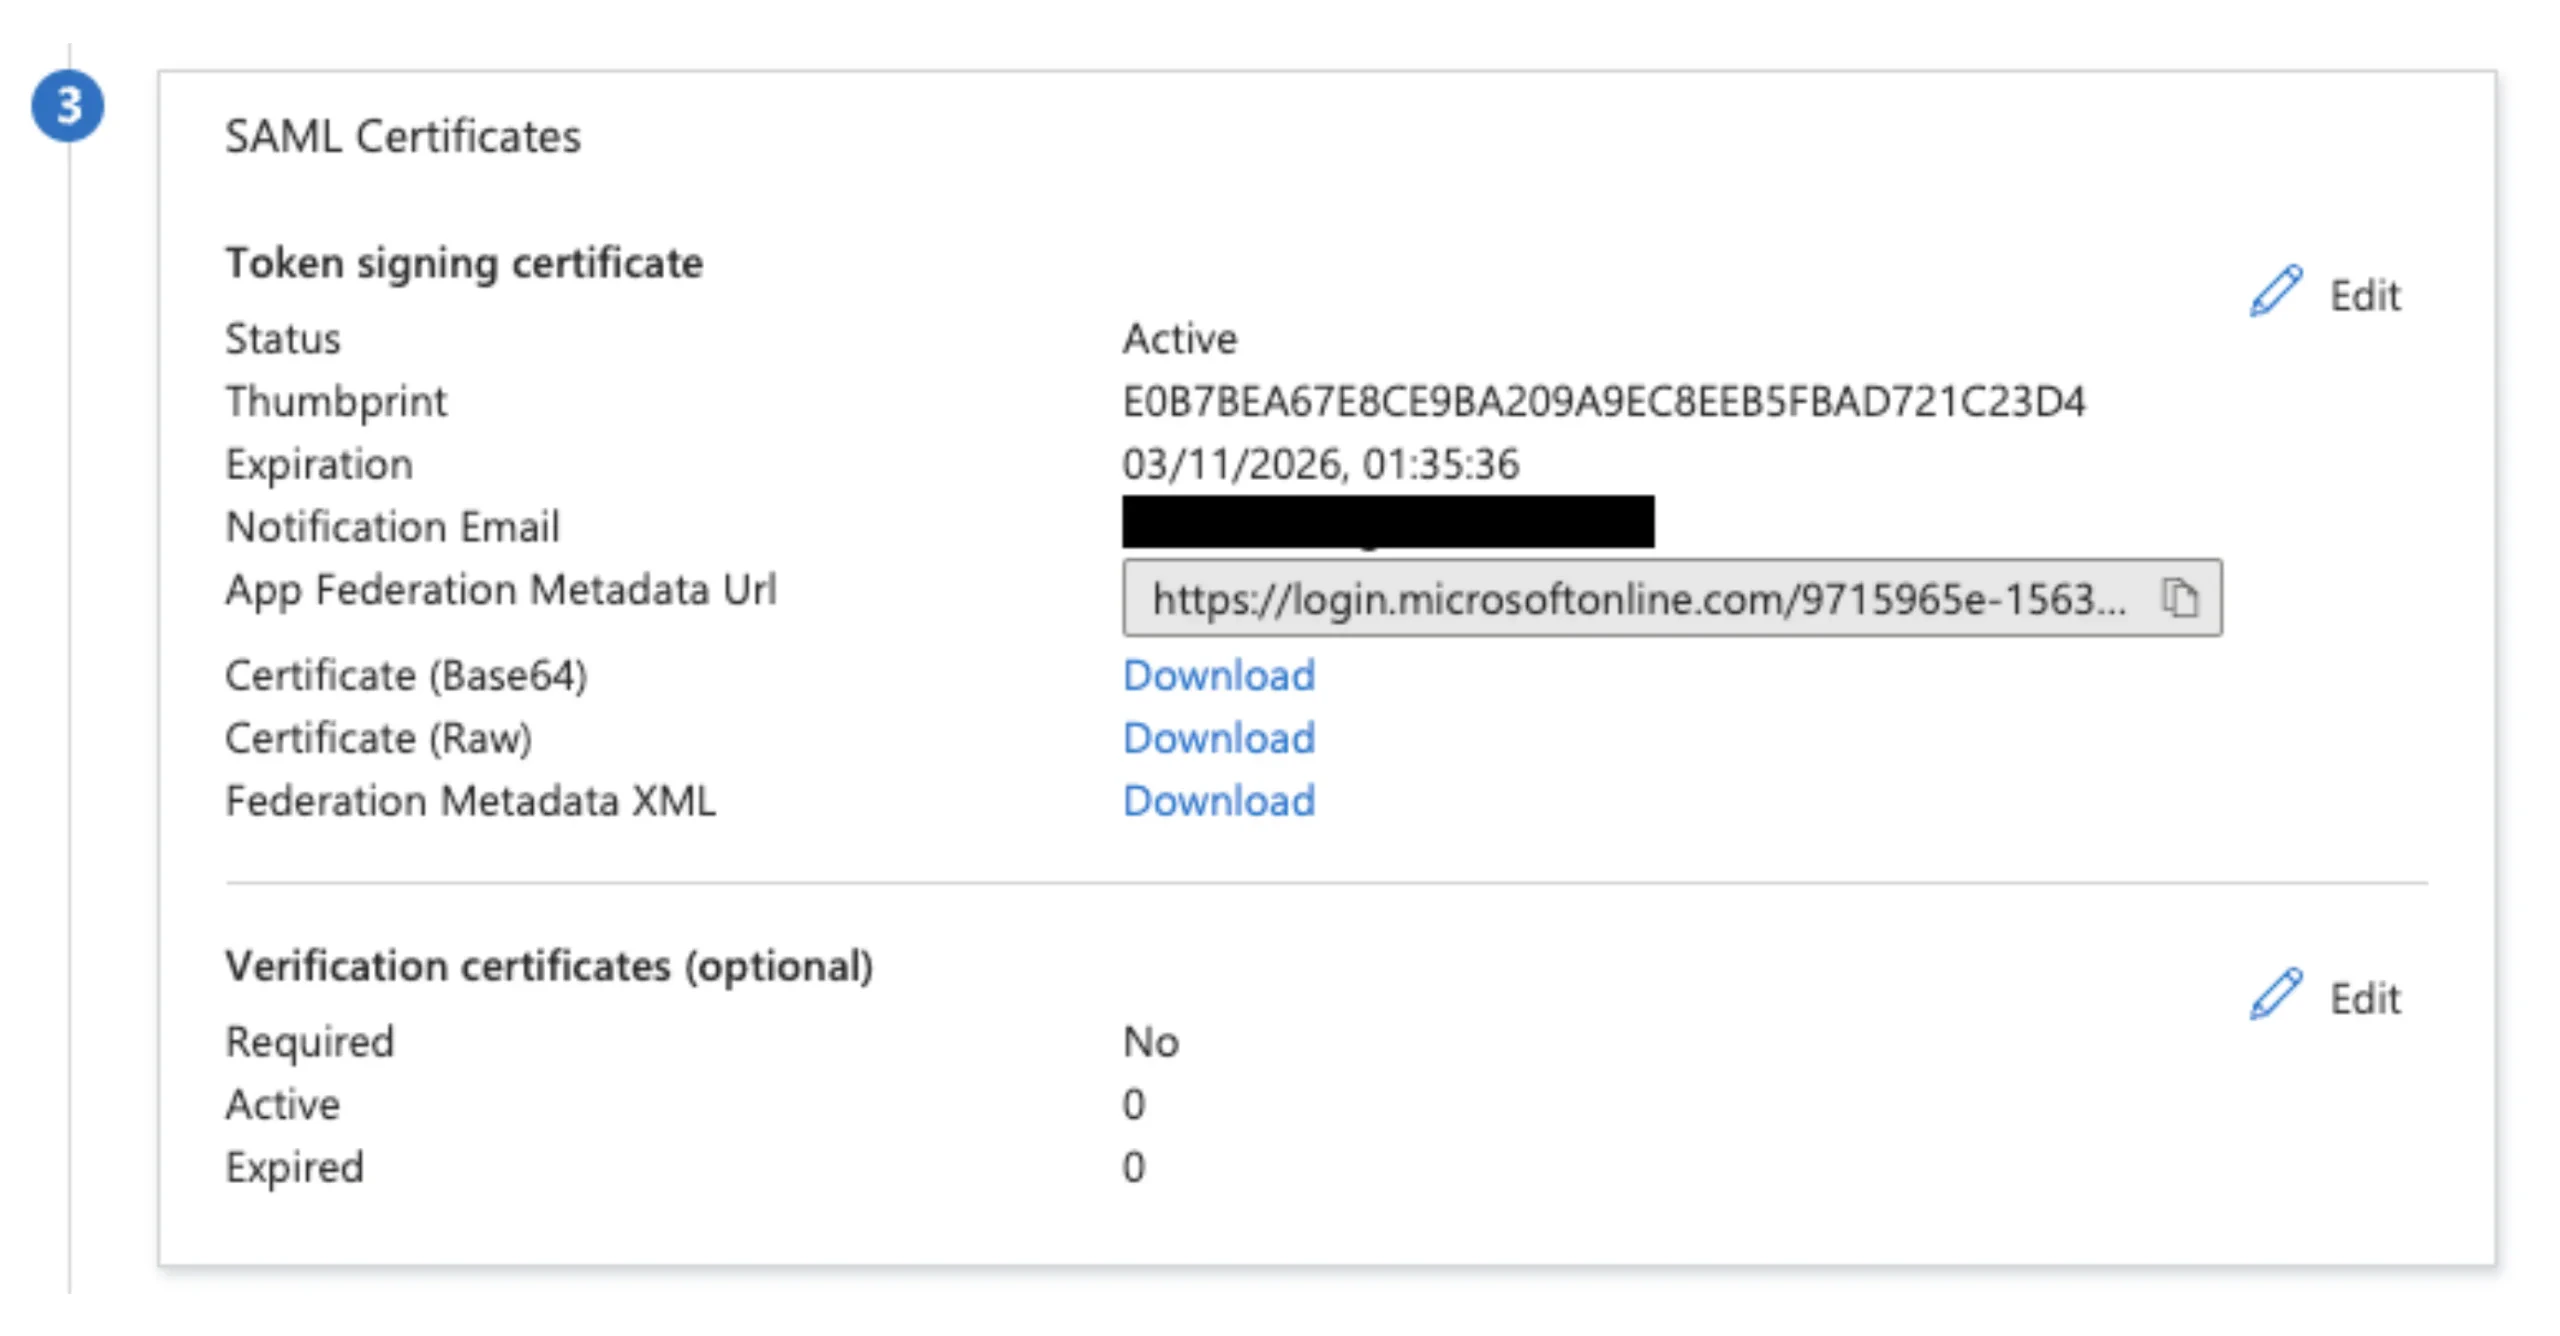
-
Copy the App Federation Metadata URL available in SAML Certificates.
Create Entra ID SSO in Endor Labs
After creating the application in Entra ID, configure Endor Labs to use Entra ID as the identity provider (IdP). To set up Entra ID as your SAML IdP:- Sign in to Endor Labs and select Settings > Access Control from the left sidebar.
- Select Custom Identity Provider.
-
Provide the following details.
- Type of Identity Provider: SAML.
- Identity Provider Name: Entra ID.
- SAML Identity Provider Metadata URL: Enter the Metadata URL copied from SAML certificates section in Entra ID.
- Attributes: Enter email, groups. Separate the attributes using the
enterorreturnkey.
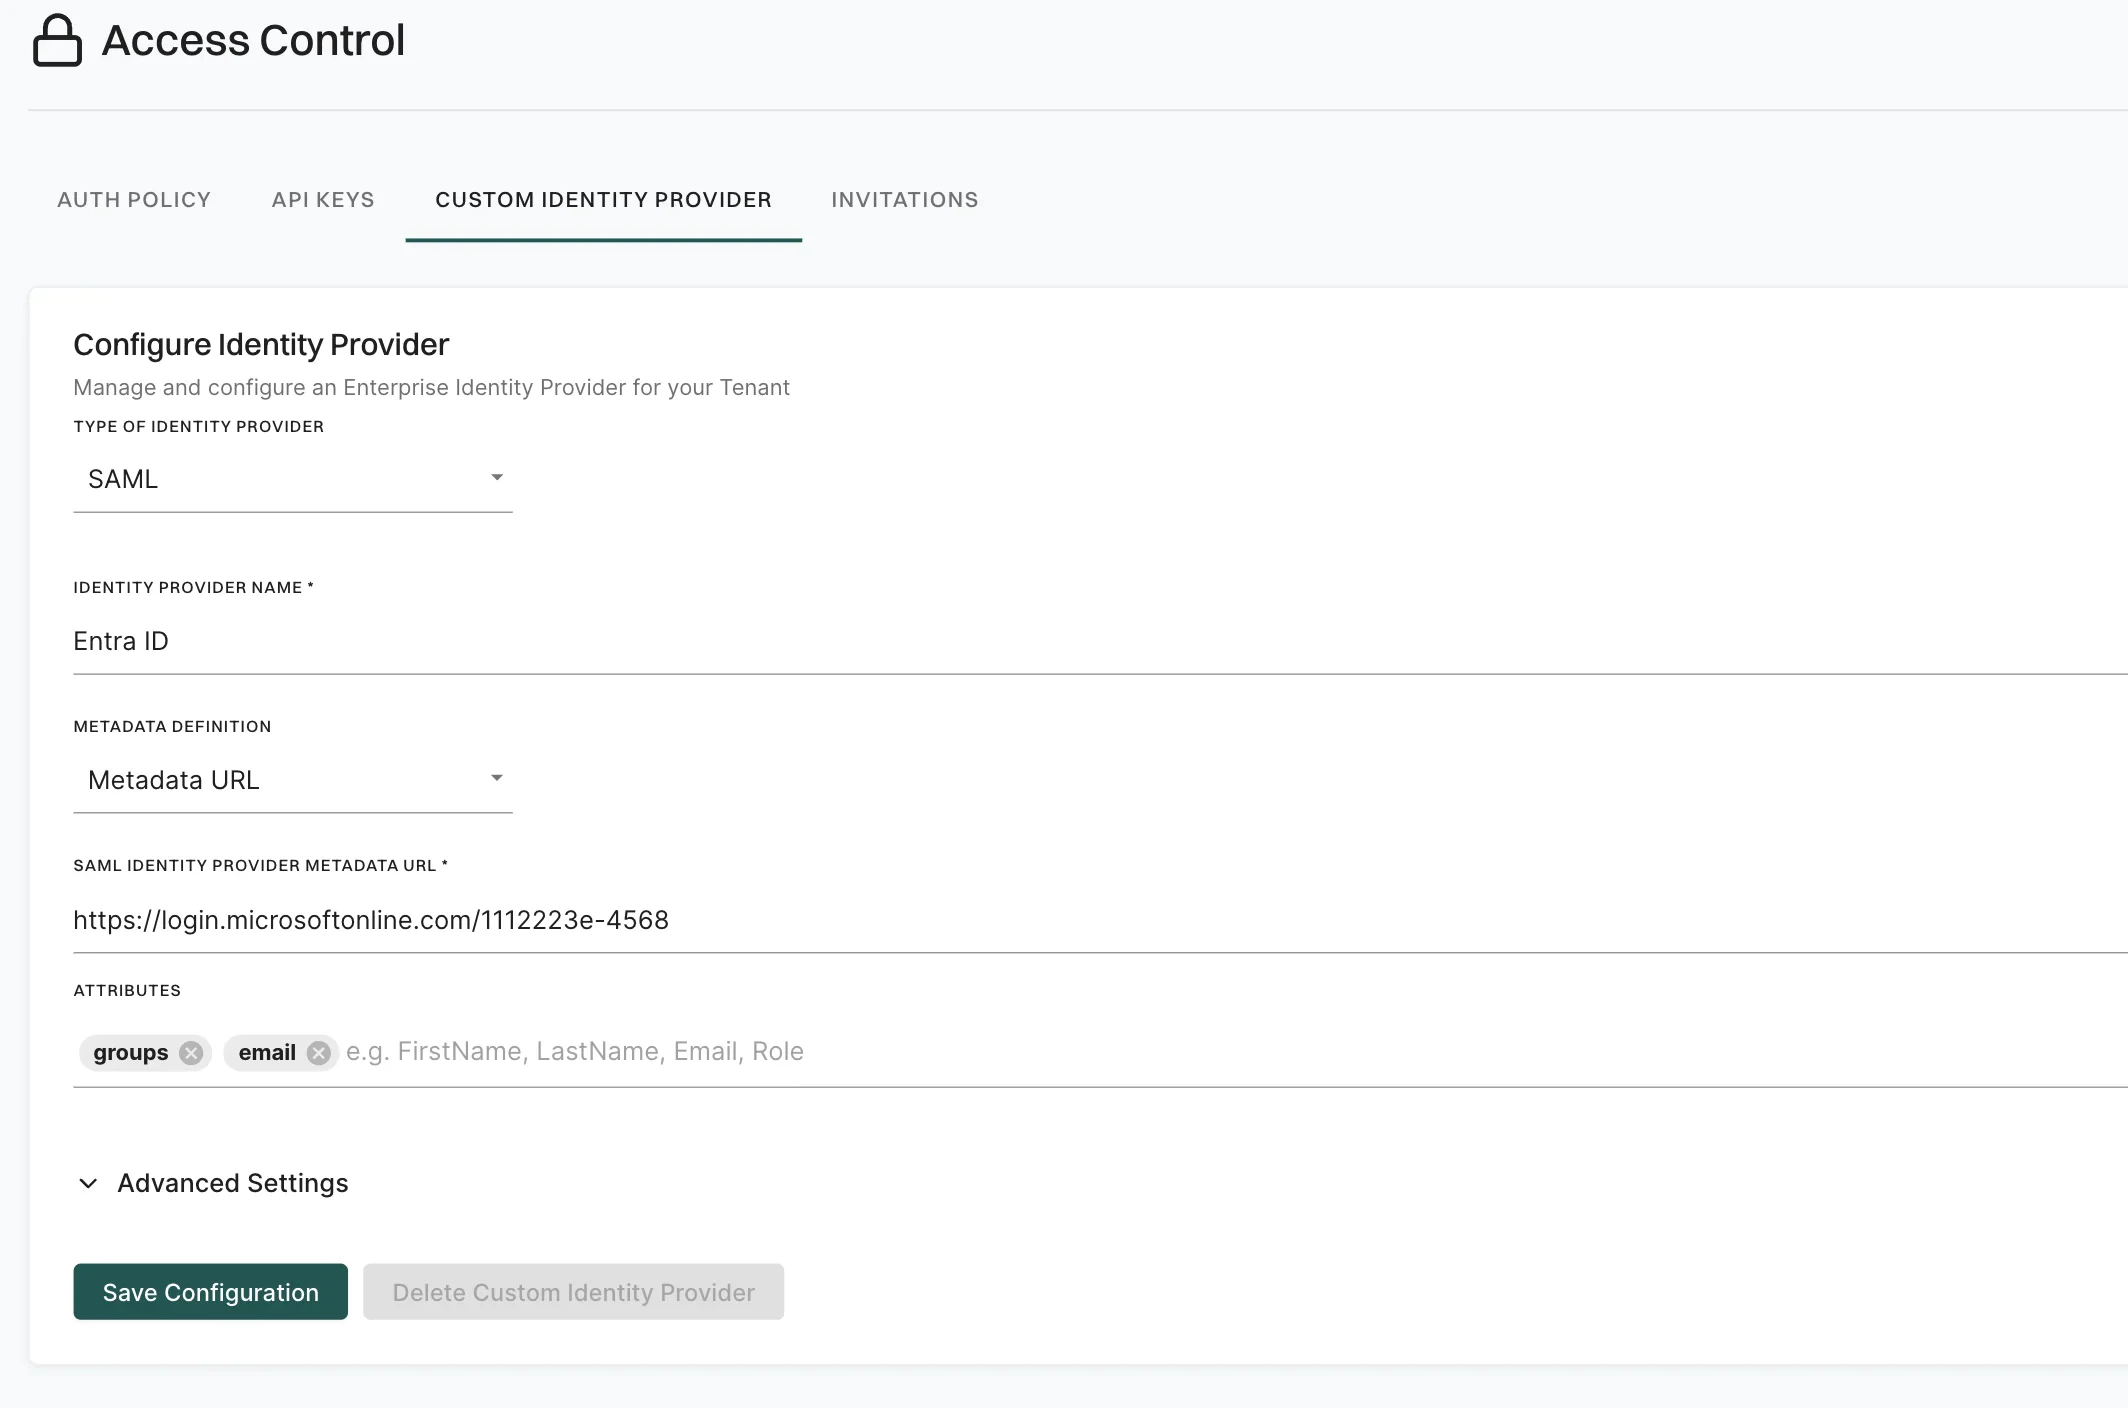
- Click Save Configuration.
Configure your authorization policy
After setting up Entra ID as your SAML IdP, you must configure an authorization policy for your users and groups. To configure an authorization policy:- Sign in to Endor Labs and select Settings > Access Control from the left sidebar.
- Select Auth Policy and click Add Auth Policy.
- Select Entra ID SAML from the Identity Provider list.
- Choose the necessary permissions. See authorization roles for more information.
- Configure Claims as a key-value pair.
- For individual users, provide
useras Key and the user’s email as Value. - For groups, provide
groupsas Key and the group ID configured in Entra ID as Value.
- For individual users, provide
- Under Advanced, select a set of namespaces for which the authorization policy applies.